Size of A2 Cards by Kathleen Rosenfield July 2022
Size of A2 Cards
Hey Stampbuddies,
Today I’m going to show you the size of A2 cards and how to measure, cut and score them from cardstock. In addition, I will also show you how to measure and cut the mat and card front.
So many times, I have written down measurements on my grid paper, while I’ve been working, and then thrown the grid paper away when I finished. As a result, I predict this post will be a handy reference for us on how to make this very popular card size, mat and card front from start to finish.
Most importantly, I am also going to show you a short video on how to make this size card.

The Project:
How to:
- Make the card base, mat and card front:
Card base:
Cut a piece of thick white cardstock 8 1/2 x 11 in half horizontally using a papertrimmer. Now you have two A2 cards.
Score each piece at 4 1/4 horizontally. Fold each and use a bone folder for a good fold.
Each card will measure 4 1/4 x 5 1/2.
Mat:
Cut a piece of cardstock, 4 1/8 x 5 3/8 for a thin mat, for this card I used Night of Navy.
Card front:
Cut a piece of Basic White cardstock 4 x 5 1/4 for card front.
Sizes of A2 card, mat and card front:
Finished card size 4 1/4 x 5 1/2
Mat 4 1/8 x 5 3/8
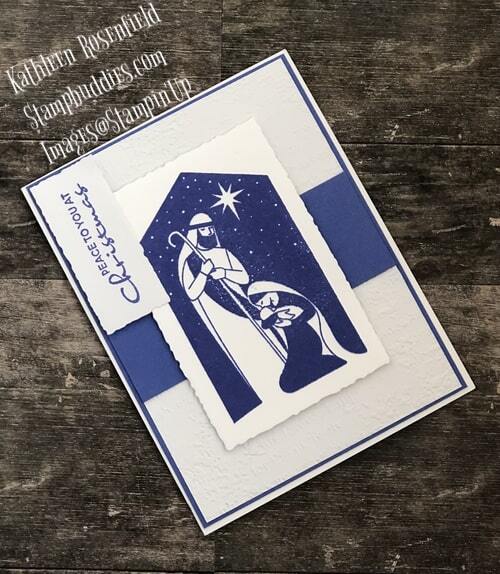
Card front 4 x 5 1/4 - To make the card shown:
Adhere navy mat to white cardstock.
Use embossing folder for card front and run through embosser.
Cut a strip of Hues of Happiness Designer Series Paper 1 1/4 x 4.
Cut flowers and leaves from Hues of Happiness paper using flower die cuts and embosser.
Using Charming Sentiments Bundle, stamp sentiment on piece of Basic White cardstock and using die cut, run through embosser.
- Adhere all papers using multipurpose glue as shown and adhere all other elements (flowers, leaves and sentiment) using dimensionals.
Enjoy your “better than store bought” handmade card!
The Supplies:
Product List

 Designer Series Paper")


")


The Video:
The Wrap Up for Size of A2 Cards:
Thanks for checking out my Size of A2 Cards post. I decided to write this because I struggled with measurements for the cards, mats and card fronts for quite some time and if I didn’t write the measurements down, I had to look them up again and again. As a result, you can now save this article and video to use as a reference for your A2 cards.
Please feel free to sign up for my emails. I promise not too many!! Also, please click on any of the supplies above to add to your card making stash. Enjoy and Happy Stamping!

Pingback: Happy Birthday Ray of Sunshine Card
Pingback: How to use Stamps with Ink
Pingback: Making a Shaker Card with Bottled Happiness
Pingback: Glamping Christmas Card Idea
Pingback: A Christmas Card Message from Peaceful Deer